Screencasting is to video as screenshot is to images. It is the real-time recording of what a device is displaying for keepsake or distribution purposes. Although it is commonly mistaken for screen mirroring, screencasting is a feature that allows a device’s user to record the ongoings on a device, such as a laptop, desktop, smartTV, or smartphone, with the same device. For instance, a smartphone operator can record the smartphone’s screen as he plays a game or watches a video on it.
While many devices can perform screencasting by installing a third-party application, some devices, such as a PC with Windows 10 can do so without an app as the operating system comes with a built-in screen recording feature.
The Built-in Screen Recording Feature on Windows 10
Screen recording is possible on Windows 10 through the Xbox Game Bar, a feature designed not just for gamers but for anyone who wants to capture screen activities with ease. This integration allows users to access a suite of tools that are especially useful for recording and sharing what’s happening on their computer screens.
The Xbox Game Bar serves as a central hub for many functions. One of the standout qualities of the Xbox integration and Game Bar for Windows 10 is its user-friendly and intuitive design which can be demonstrated through the following:
Accessible Shortcut
Activating the Game Bar is as simple as pressing Win+G. This hotkey brings up a transparent overlay on the screen, allowing users to access various recording options without leaving their current application.
Quick Recording Start
Recording your screen is a breeze. Once the Game Bar is open, you can instantly hit the record button and begin capturing your screen activities.
Customizable Settings
Users can adjust settings like audio sources, video quality, and where the recordings are saved. This flexibility makes it easy to tailor the feature to your specific needs.
Minimal Learning Curve
The interface is straightforward, and most users can quickly grasp how to use the feature. It doesn’t require extensive technical knowledge, making it accessible to a broad audience.
In-Game Overlay
Gamers, in particular, benefit from features like tracking frame rates, monitoring system performance, and even streaming their gameplay with minimal disruption, all thanks to the Game Bar’s overlay.
Steps to Use the Windows 10 Built-in Screen Recording Tool
To use the built-in screen recording tool on Windows 10, follow these steps:
Preparing for Recording
Prepare to record your screen activities by checking if the Game Bar is enabled, you have the needed audio settings, and you have chosen a good recording area.
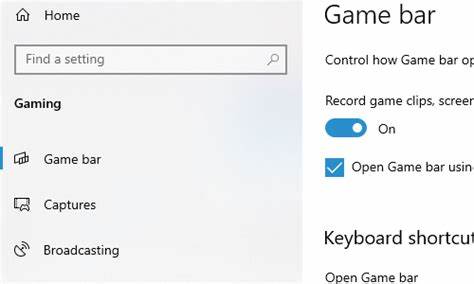
Ensure Game Bar is Enabled
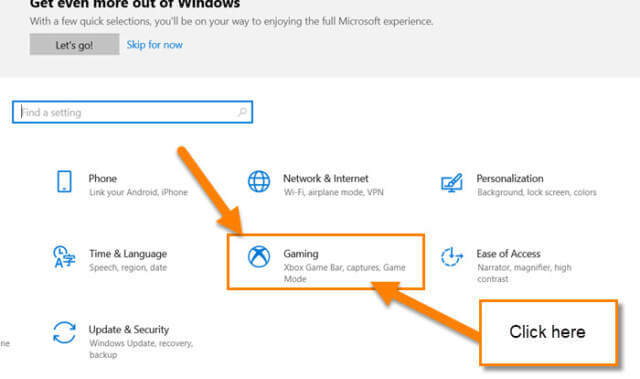
First, make sure the Game Bar is enabled on your Windows 10 system. To do this, follow these steps:
- Go to “Settings” on your PC.
- Under settings, click on “Gaming”.
- Under gaming, click on “Game Bar”. A toggle will appear before “Game Bar”. Click on the toggle to switch it on.
Select Your Recording Area
Decide which part of your screen you want to record. The Game Bar allows you to record the full screen or a specific portion.
Audio Settings
Choose your audio sources. You can record system audio, your microphone, or both. Adjust these settings according to your needs.
Starting and Stopping the Recording
Flow these steps to start and stop your screen recording:
Open the Game Bar
While in the application or on the screen you want to record, press the keyboard shortcut Win+G. This will open the Game Bar overlay.
Start Recording
Click the “Record” button (it is the red button on the screen) or press the keyboard shortcut Win+Alt+R to begin recording. The Game Bar will indicate that the recording has started.
Stop Recording
To stop recording, either click the red “Stop” button on the Game Bar overlay or use the Win+Alt+R shortcut again. Your recorded video will be saved automatically.
Additional Features and Shortcuts
Other than screen recording, the Xbox Game Bar has other features that you can access through some shortcuts. They include:
Screen Capture
If you need to take a screenshot instead of recording, use the “Screenshot” button on the Game Bar overlay or press Win+Alt+PrtScn.
Accessing Microphone Settings
You can adjust your microphone settings by clicking the microphone icon on the overlay. This is handy if you need to mute your microphone during the recording.
Recording Timer
You can set a timer to delay the start of your recording using the “Capture Timer” option in the Game Bar settings.
Background Recording
Background recording on Windows 10, through the Xbox Game Bar, allows you to record and capture screen activities without the need for the Game Bar overlay to be visible or active. To do this, follow these steps:
- Press Win+G to open the Xbox Game Bar.
- In the Game Bar overlay, click on the gear icon to access settings.
- Under the “General” tab, you’ll find the option “Record in the background while I’m playing a game.” Toggle this setting to “On.”
- Press Win+Alt+R or click the “Record” button within the Game Bar overlay to start recording. You’ll see a timer indicating that the recording has started.
- Click the “X” in the upper right corner to minimize the Overlay; it will disappear, but the recording will continue in the background.
- To stop the background recording, you can bring up the Game Bar overlay by pressing Win+G, and then click the “Stop” button or use the Win+Alt+R shortcut. Your recorded video will be saved automatically.

Accessing and Managing Recorded Videos
Searching all the folders on your PC to locate your screen recording wastes time. You can easily locate, access, and manage your screen recordings on Windows 10.
Access Recorded Videos
After you’ve stopped recording, you can access your recorded videos through the “Captures” folder. By default, these are saved in the “Videos” folder under “Captures.”
- Press Win+G to open the Xbox Game Bar.
- Click on the “Captures” Button. This button looks like a film reel icon.
- A panel will open, displaying your recorded videos. You can click on a video to play it, delete it, or access additional options.
Editing and Sharing
You can edit your recorded videos using video editing software or share them directly from the “Captures” folder to various platforms.
Advanced Settings and Customization
You can explore the advanced settings and customizations of the Xbox Game Bar to tailor your recordings to your specific requirements.
Gaming Section in the Settings App
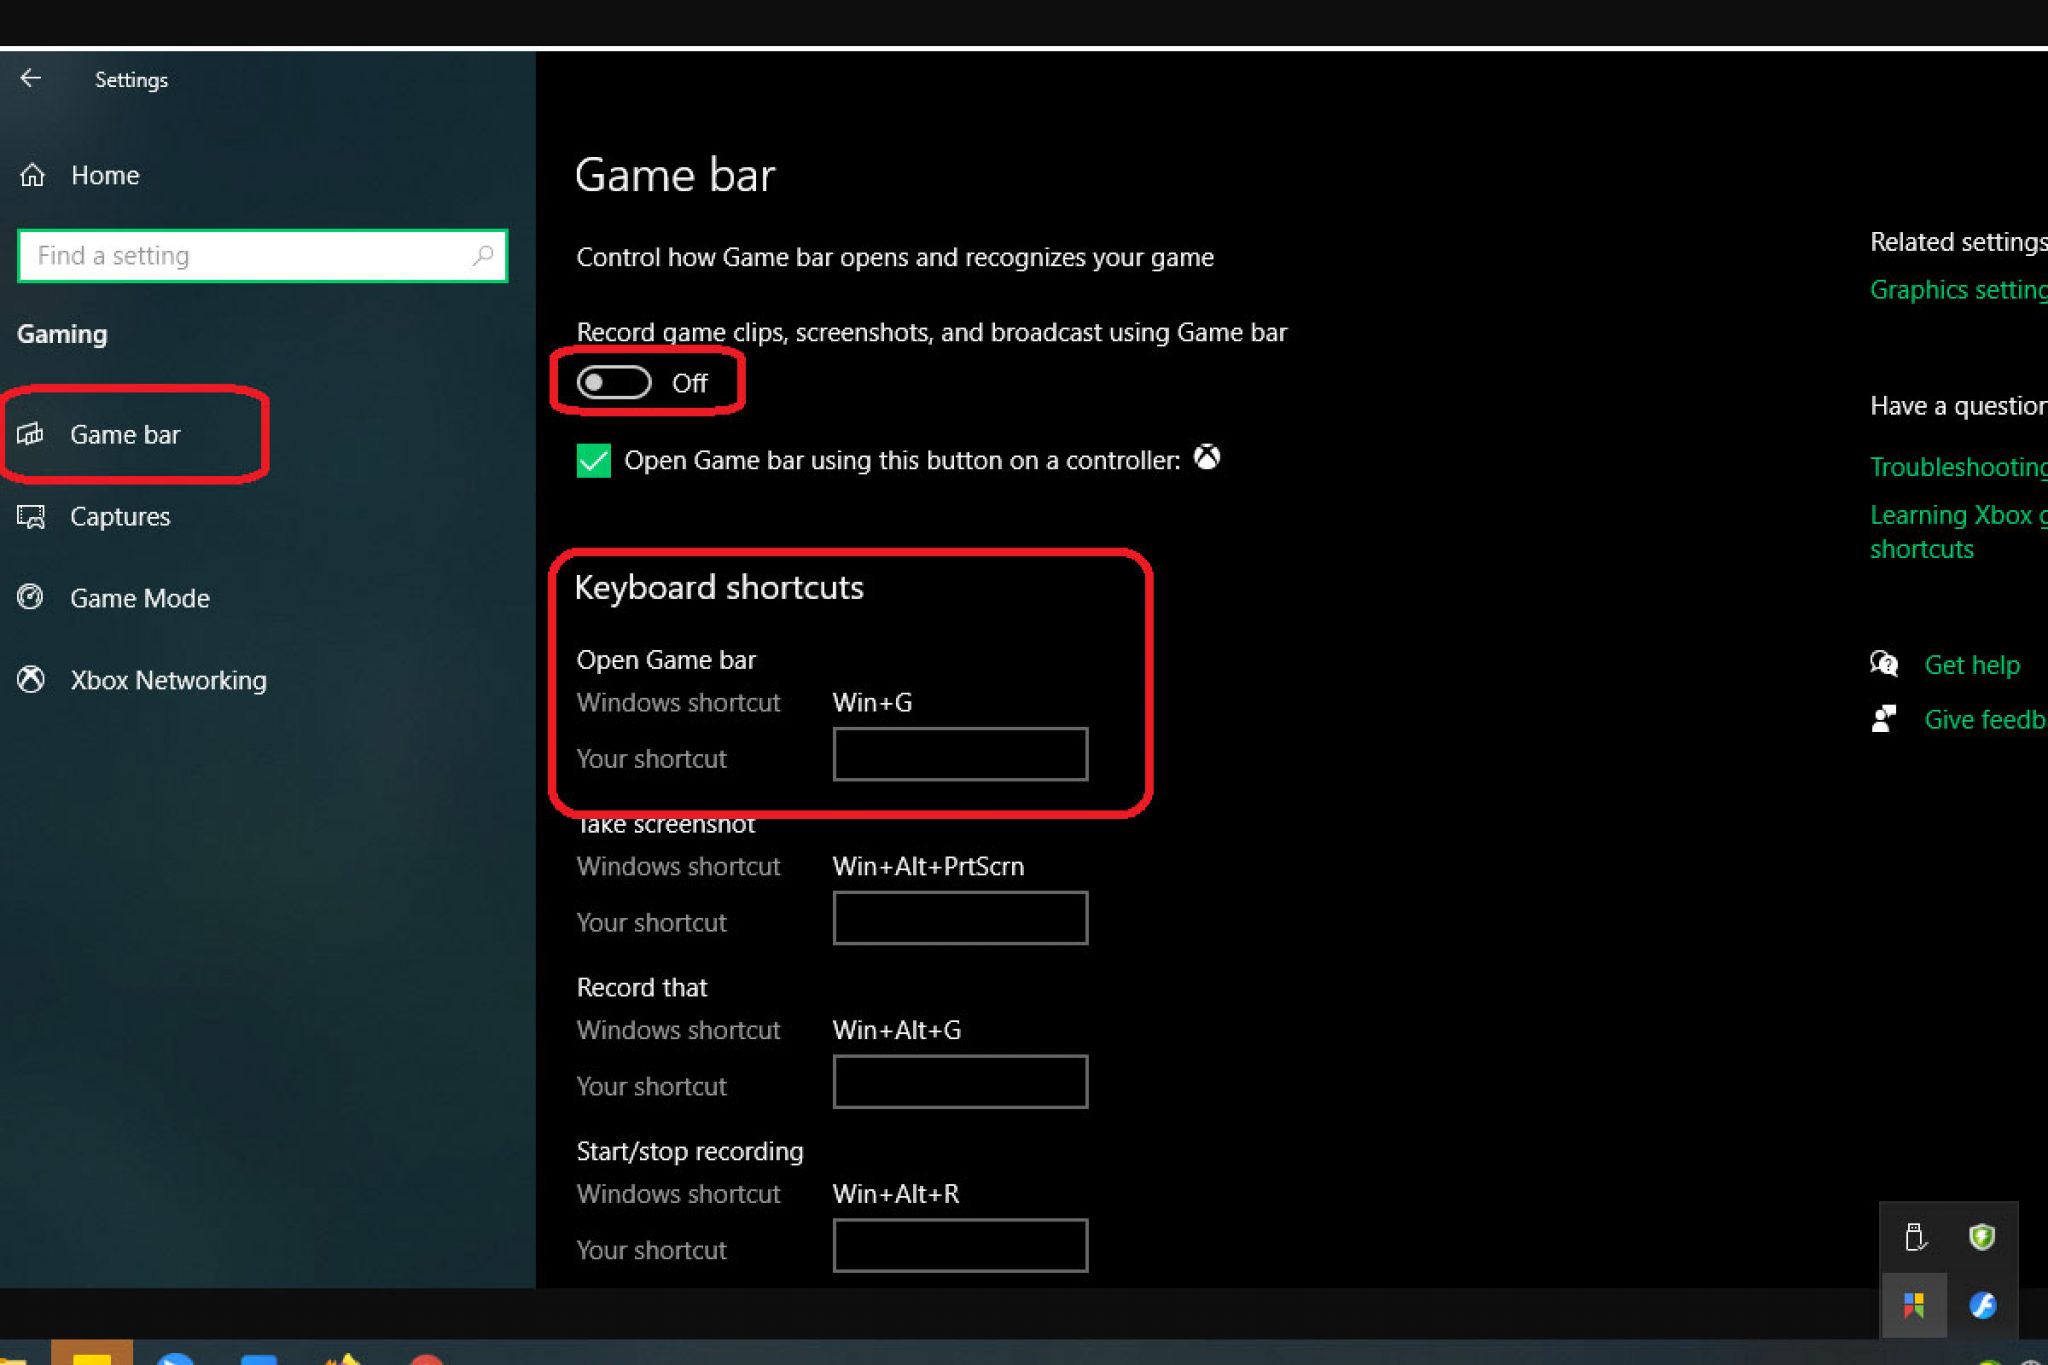
Tailor the keyboard shortcuts for starting and stopping recordings or taking screenshots to your preference.
- Go to “Settings”
- Navigate to “Gaming”
- Click on “Game Bar.”
- Under the “Keyboard shortcuts” section, click on a shortcut box and input your desired key combination.
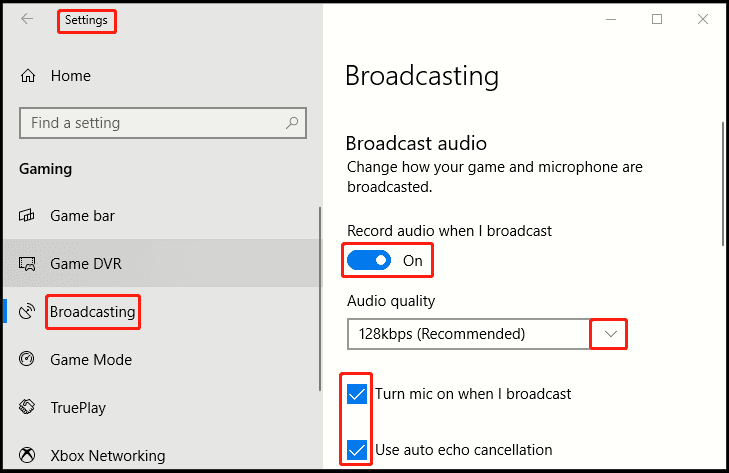
Audio Recording Preferences During Broadcasting
Customize how audio is handled during broadcasting, including the option to include or exclude your microphone and system audio.
- Access the Game Bar settings.
- Navigate to “Audio” settings.
- Configure “Broadcasting” audio options according to your needs.
Using the Game Mode
Game Mode optimizes your PC’s performance for gaming by allocating more resources to the game. This can result in smoother gameplay.
To enable Game Mode:
- Go to “Settings”
- Click on “Gaming”
- Click on “Game Mode” and toggle the switch to “On.”
You can also enable Game Mode for specific games through the Game Bar overlay.
Adjusting Recording Duration Limits
You can set a maximum recording duration for your captures, which can be useful for managing file sizes.
- In the Game Bar settings, go to the “Capture” tab
- Adjust the “Maximum recording length” slider to your preferred time limit.
Hardware Requirements and Limitations
To get the best experience with the Xbox Game Bar for screen recording on Windows 10, ensure your device has the following specifications:
Minimum System Requirements
Windows 10 requires at least a 1 GHz or faster processor, 1 GB of RAM for a 32-bit system or 2 GB for a 64-bit system, and 16 GB of free hard disk space.
Graphics Hardware
Screen recording heavily relies on your graphics hardware. While Windows 10 doesn’t have strict video adapter requirements, having a dedicated graphics card with hardware encoding support (like NVIDIA NVENC or AMD VCE) can greatly enhance recording performance and quality.
Available Storage
You’ll need sufficient free storage space on your hard drive to save recorded videos. High-quality recordings can take up a considerable amount of space.
What to Do When the Record Button Gray Out?
If the record button is grayed out in the Xbox Game Bar, here are some potential solutions
- Update graphics drivers: Outdated or incompatible graphics drivers can cause issues. Make sure your graphics drivers are up to date.
- Enable game bar: Ensure that the Game Bar is enabled in your system settings.
- Check for incompatible applications: The Game Bar might not work with certain applications. Make sure you are trying to record in a compatible program or game.
- Check your keyboard shortcuts: If you’ve customized keyboard shortcuts for the Game Bar, ensure you are using the correct key combination to activate it.
- Check if you have enough system resources: If your system is under heavy load, the “Record” button might be disabled. Try closing unnecessary applications or reducing the load on your system.
- Check Game Mode: If Game Mode is active, it can affect the availability of the Game Bar.
- Check if your active account is an administrator: Ensure you are using an account with administrator privileges, as this may be required to use the Game Bar.
- Troubleshoot: If the issue persists, you can try troubleshooting using the Windows 10 settings or running the built-in Windows Troubleshooter to diagnose and fix problems with the Game Bar.
Alternative to the Built-in Screen Recording Tool on Windows 10
Sometimes, the Xbox Game Bar may fail to record your screen recording due to many reasons including:
- Unsupported applications
- Insufficient hardware resources
- Unsupported graphics hardware
- Outdated or incompatible drivers
- Third-Party Software conflicts
- Recording restrictions in games
- Incompatible software or processes
When your Windows 10 fails to record, you can use any of the best alternative screencast recording tools for Windows.
Conclusion
Screen recording is an important feature that can help you explain situations better, making it useful for everyone. You can use the built-in screencasting tool in Windows 10 and customize it to your preference. However, when it doesn’t work for you, explore the available alternatives.